Beginner's Guide to Automating Tasks with Zapier
Automate your tasks effortlessly with Zapier
1. Introduction to Task Automation
What is task automation and why it matters.
Task automation refers to the process of using software to automate routine tasks, thereby saving time and reducing errors. In today’s fast-paced digital world, task automation is crucial for enhancing productivity and efficiency. Whether you're managing emails, scheduling meetings, or processing data, automating these tasks can free up valuable time for more strategic activities.
Overview of Zapier and its role in automation.
Zapier is a powerful tool that connects different applications, allowing users to create automated workflows called 'Zaps.' These Zaps trigger actions based on specific events, helping you manage multiple platforms without manual intervention. With over 3,000 integrations available, Zapier supports a wide range of popular apps like Gmail, Slack, Trello, Google Sheets, and many more.
2. Getting Started with Zapier
Signing up for a Zapier account.
To begin using Zapier, start by visiting zapier.com and clicking on the 'Sign Up' button. You can choose between a free plan or a paid subscription depending on your needs. The free plan offers limited features but is sufficient for testing and basic automation. Once signed up, verify your email address to activate your account.
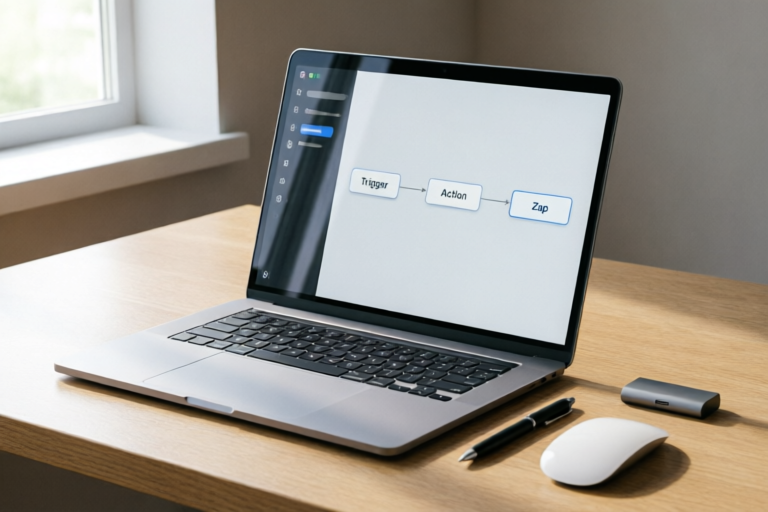
Navigating the dashboard and understanding basic terms.
Upon logging in, you'll be greeted with the Zapier dashboard. This is where you can manage all your Zaps, view recent activity, and access settings. Familiarize yourself with key terms such as:
- Trigger: An event that initiates a Zap.
- Action: A task performed after the trigger occurs.
- Pause: A delay between steps in a multi-step Zap.
- Filter: A condition that determines whether an action should occur.
3. Creating Your First Zap
Step-by-step guide on setting up a simple Zap.
Creating your first Zap is straightforward. Follow these steps:
- Select a Trigger: Click on 'Make a Zap' and choose an app (e.g., Gmail) and a trigger (e.g., New Email).
- Set Up the Trigger: Provide any necessary details and click 'Continue.'
- Add an Action: Choose another app (e.g., Slack) and an action (e.g., Send Message).
- Configure the Action: Fill in the required fields and click 'Continue.'
- Test the Zap: Zapier will test the connection and notify you if everything works correctly.
- Name and Save: Give your Zap a name and save it.
Choosing triggers and actions that work best for you.
When selecting triggers and actions, consider which combinations will benefit your workflow most. For example, you might want to automatically send new emails to a CRM system or update a spreadsheet with new data entries. Explore the extensive list of available integrations to find the perfect match for your needs.
4. Advanced Features of Zapier
Exploring multi-step Zaps and connected apps.
Once you're comfortable with basic Zaps, dive into more complex automations using multi-step Zaps. These allow you to chain multiple actions together, creating intricate workflows. Additionally, discover the power of connected apps—applications that integrate seamlessly with Zapier, expanding your automation capabilities.
Utilizing filters and delays to customize workflows.
Filters enable you to set conditions for when actions should occur, ensuring only relevant information triggers your automations. Delays provide pauses between steps, allowing you to control the timing of your workflows. For instance, you could set a delay before sending a reminder email or wait for a specific time of day before triggering an action.
5. Best Practices for Efficient Automation
Tips for optimizing your Zaps for performance.
To ensure your Zaps run smoothly and efficiently, follow these best practices:
- Regularly review and optimize your Zaps to remove unnecessary steps.
- Use filters to prevent irrelevant data from triggering actions.
- Test your Zaps thoroughly to catch any issues early.
- Consider using Zapier's premium features for enhanced functionality.
Common pitfalls to avoid when automating tasks.
Avoid common mistakes that can hinder your automation efforts:
- Overcomplicating your Zaps with too many steps.
- Ignoring error handling and notifications.
- Failing to monitor your Zaps for performance issues.
- Not keeping your integrations updated.
6. Conclusion and Next Steps
Recap of key points covered in the guide.
This guide has introduced you to the basics of task automation using Zapier, from signing up for an account to creating advanced multi-step automations. We've explored essential concepts like triggers, actions, filters, and delays, and provided tips for optimizing your workflows.
Encouragement to explore more complex automations and resources for further learning.
Now that you've mastered the fundamentals, take your automation skills to the next level by experimenting with more complex Zaps. Visit Zapier's official blog and community forums for additional tutorials, best practices, and user stories. Stay curious and keep exploring the endless possibilities of task automation with Zapier!
Comments

The advanced features are exactly what I was looking for. Can't wait to dive deeper.
This guide has been a game changer for my daily tasks. Highly recommend!

Love the filters and delays section. Really helps fine-tune my workflows.

Anyone else find the multi-step Zaps a bit confusing? Any tips?

Thanks for the breakdown on creating my first Zap. Saved this for future reference!

Great intro, but could use more examples on how to connect different apps.

Finally! A step-by-step guide to get started with Zapier. This actually works!